Trying out Microsoft Font Maker

I recently heard about the app Microsoft Font Maker and immediately downloaded it to try it out! This app allows you to turn your handwriting into a font to use on the computer. Using a stylus on my Surface Pro 4, I began trying it out. The first step was to write out the letters and symbols. Here is my first font part way through.

After writing out the letters and symbols I wrote out three sentences. (I noticed the sentences changed when I did this process a second time.)

After adjusting the spacing of the words and letters, my font was all set. I saved it to my computer, installed it (super easy!), and tried it out in Microsoft Word.

The whole process took me less than 5 minutes. So I tried again, writing a little slower this time. Here are my sentences with both fonts.

Apparently my hand writing is pretty consistent. I can barely tell the difference between the two versions I created.

As I mentioned above in my font, I think it could also be fun to make bubble letters or a fun kind of font as well. I’ve always loved creating fonts on paper and drawing fun letters–now I can do it on the computer! As I begin 2019, I’m curious if I will find ways to use this in the classroom, in addition to having fun with it.

Have you used this app, or another handwriting-to-font app? What would you use an app like this for?

Can you teach students to be less distracted on computers? We tried! And it worked!

I teach at a one-to-one school. When you look around my classroom you will see various laptops–Surfaces, MacBooks, Dells, and many others. I love that my students have computers! And, they present a whole new level of distraction into the classroom. Email, iMessage, and Buzzfeed fill the screens, sometimes it seems just as often as OneNote, where we have our course information. So this year, my teaching team and I tried out a new way to teach about technology distractions in class.

Distracted on Purpose

At the beginning of the lesson, I handed out a slip of paper to each student and told them to follow the directions for the next 10 minutes. After a few students asked if I really wanted them to follow these directions, the lesson continued as normal. There was some direct instruction then time to look over a page in the textbook and answer questions that were posted on the SmartBoard. During this time, students followed their card.

Half of the cards said: “Pay attention and take notes in the next 10 minutes. There will be a quiz at the end of this activity on the following four terms…” and listed out the specific terms.

The other half of the cards had various directions that would force them to be off task. I had brainstormed and chosen things I know my students do in class at times. Some examples were:

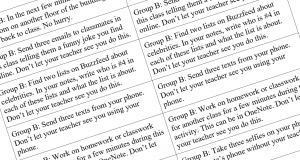
  • Send three emails to classmates in this class telling them a funny joke you find online. Don’t let your teacher see you do this.
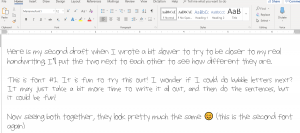
  • Find two lists on Buzzfeed about celebrities. In your notes, write who is #4 in each of these lists and what the list is about. Don’t let your teacher see you do this.
  • Send three texts from your phone. Don’t let your teacher see you using your phone.
  • Work on homework or classwork for another class for a few minutes during this activity. This can be in OneNote. Don’t let your teacher see you do this.
  • In the next few minutes go to the bathroom on another floor of the building then come back to class. No hurry.

The Quiz

After 10 minutes, I told all my students to close their computers and to take out a pen for a quiz. Immediately, the room was quiet. I reassured them the quiz would not count for a grade, but we would score it to see how everyone did. I told students to answer the questions on the quiz then turn over the quiz and answer “How did the directions on your slip help or hurt how you did on this quiz?”

As they began, the students who knew the quiz was coming answered the questions quickly and correctly. The students with the other directions, were predictably, not as confident. Many could not answer any of the four questions.

Reflections

The students totally got it. Their reflections after this short activity were clear. When they were distracted on their devices or phones they did not pay as close attention to the lesson. Knowing what will be on a quiz helps, so maybe it is worth it to look at the study guides we provide. In each class, the person who had gone to the bathroom shared they “had no idea what was going on” once they returned.

I was reminded at how impactful a short, engaging activity can be for students. I could tell them that technology distracts them from being present to the learning in class, which I do, and it would likely not sink in. This activity helped them to get to the same point on their own, in 10 minutes. It was definitely worth the time! I was also amazed at how much I did not see–selfies, Buzzfeed, emails, phones–for the most part they did a great job hiding it all from me.

An unexpected reflection came a few weeks later at a technology committee meeting. An English teacher who had heard about our lesson shared that she noticed a difference in her sophomore classes after we did this activity in Religion. The French teacher asked when we had done it, because she, too, had noticed a change.

This short activity led to big gains for my students. I know the teaching on distractions and devices is not complete, but it was a memorable and impactful start!

First Week Flipgrid

My selfie (with stickers) I posted at the end of my video. Students loved adding stickers to theirs

The first week back with students was so fun and so tiring! It’s amazing that even as I start year 14 of teaching, I still forget just how tiring that first week back is until I’m in the thick of it. Then I remember, very quickly.

One highlight of the week was the first assignment my students completed. Each student recorded a video introducing themselves on Flipgrid. Flipgrid is a website that students log into and submit a video of themselves answering a question or sharing insights. Earlier this year Microsoft purchased Flipgrid and made it free for all educators! The questions I had my students answer were: (1) What is your first and last name and what do you like to be called in class? (2) What is one thing you love? and (3) What are three words you would use to describe yourself? I was blown away by how awesome this assignment turned out!

A few highlights

  • The biggest benefit was that in these 15-30
    second videos, I got to know my students more than I have ever been able to do in the first days of school. Their personalities shined through both in their answers and how they recorded the video. There were lots of cameos by pets, siblings, and friends, which were so fun. The words my students chose to describe themselves gave me a lot of insight into their personality and interests. Watching the videos was so fun, and it was evident my students had fun making them! Also, many students watched their classmates’ videos (which was not a requirement) and in doing so were also getting to know each other more.
  • It was so helpful to hear students saying their own name. Now that these videos are done, I can use them to help me learn names this week and I can go back to them later in the year when I need a reminder on the pronunciation of a last name.
  • The videos were easy to make for students. The code to access the assignment made it easy for students to find it. Students can log in with a Microsoft or Google account, or with an email address, which means I could make my assignments only visible if you had the code and logged in with an account from my school.

I am excited to use Flipgrid again for other assignments! It’s a powerful tool to bring student voice into assessments and reflections, especially for those students who may not always want to share out loud in class. I also think it could be a good tool to use with teachers, possibly sharing insights gained from a professional development opportunity.

What are ways you could use Flipgrid with students or teachers?

Productivity Pro Tip: Set a Timer

I love learning about productivity and time management, through books, podcasts, blogs, conversations, whatever it may be. One time management tip that comes up a lot is to set a timer. This tip can be used in so many situations to help teachers. Here are some examples from my life:

  • When I am having a hard time starting to grade, I set a timer. Maybe for 30 minutes, then be done. Or even for just 15 minutes and then I can decide if I want to continue or switch tasks.
  • When I’m planning a new lesson I’ll often set a timer so I don’t get lost planning and spend 3 hours planning for a 45 minute lesson.
  • If I want to challenge myself to be super productive, I’ll set a 5 minute timer and see how many emails I can respond to in that short amount of time.
  • During lessons I often set timers (or have a student set a timer) for group time or individual work time. It’s amazing how off I can be if I just guess how long it’s been for an activity 🙂

Ideas for timers

I generally use my phone for a timer so I can set it and just leave it across the room or on a corner of my desk. If you like websites, two easy ones are:

e.ggtimer.com/

Egg Timer has a simple look to it that is clearly visible either on the page or in the title bar.

onlinestopwatch.com

More research

If you want to read more about the benefits of setting a timer, here are a couple blogs with great ideas:

Life Hacker: Use A Timer

Time Management Ninja: Set A Timer

Life Hack’s summary of a Pomodoro Timer

As you consider this productivity pro tip, when would setting a timer help you to be more productive? Have you tried this? Did it work for you?